Fall 2024 Product Release

Announcing powerful new tools to try out new providers, expedite recurring service, and get more from your assets at every location.
Try out new providers, simplify planned maintenance, and track asset transfers or repairs with ease
We’re excited to announce powerful new tools to help you build and maintain a strong provider network, streamline your planned maintenance, and get more from your assets at every location. New tools will be available 10/22–24, unless noted.
Highlights
- Try out new providers with built-in pilots. Find out how prospective providers perform at your locations before you decide to assign them long-term.
- Simplify your planned maintenance. See all your recurring services on a new overview page and create services with fewer clicks.
- Easily transfer assets between locations. Create work orders for providers to transfer assets between locations with Asset Validation.
- Create asset work orders more easily. When creating a work order, it’s easier than ever to link to the correct asset.
Try out new providers easily with built-in pilots
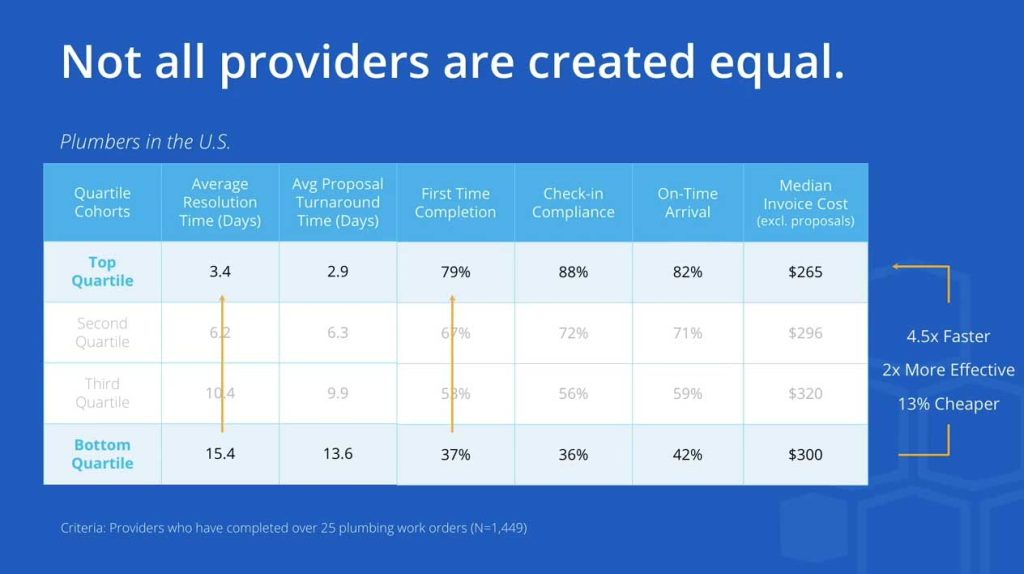
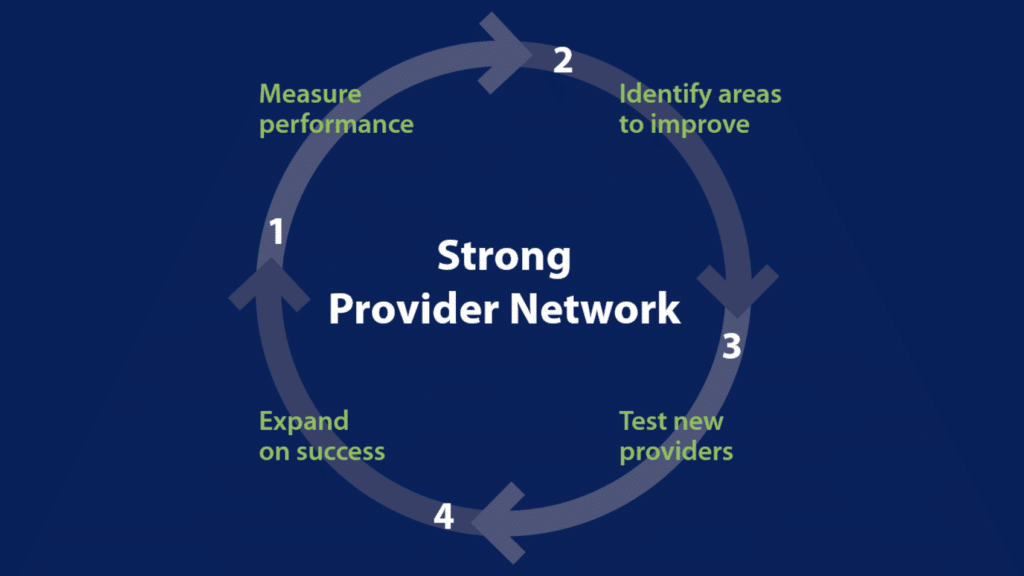
Continuously testing new providers is a key component of the Framework for a Strong Provider Network which ensures business continuity by helping you achieve the right mix of the highest quality and most cost-effective providers in the market.
A powerful new “pilot” feature in Locations & Provider Assignments automates the trial process. Easily add new providers temporarily, without changing your existing assignments. This allows you to ensure they deliver better service and meet your performance standards before you decide to rank them as your primary provider.
Just set the number of work orders the new provider should receive during the pilot (we recommend a minimum of 10 work orders within 3 months). They’ll be automatically assigned during that period, so you don’t need to manually change your assignments before and after each test.
- Find out how much you can improve. Everyone wants to find cost savings opportunities. At the same time, new providers need to learn your business, deliver better results, and meet all your expectations. With pilots, you can prove that a new provider gives you better service before giving them the job longer-term.
- Flexibly test out new providers. If a pilot provider meets or exceeds your expectations, you can rank them as your new primary. If not, your assignments automatically return to your existing primary provider when the pilot ends. You can easily continue to test until you find the right fit.
- Adapt quickly to changing business needs or market conditions. Pilots make it easy to test multiple providers continuously and adjust your mix without impacting your ongoing operations.
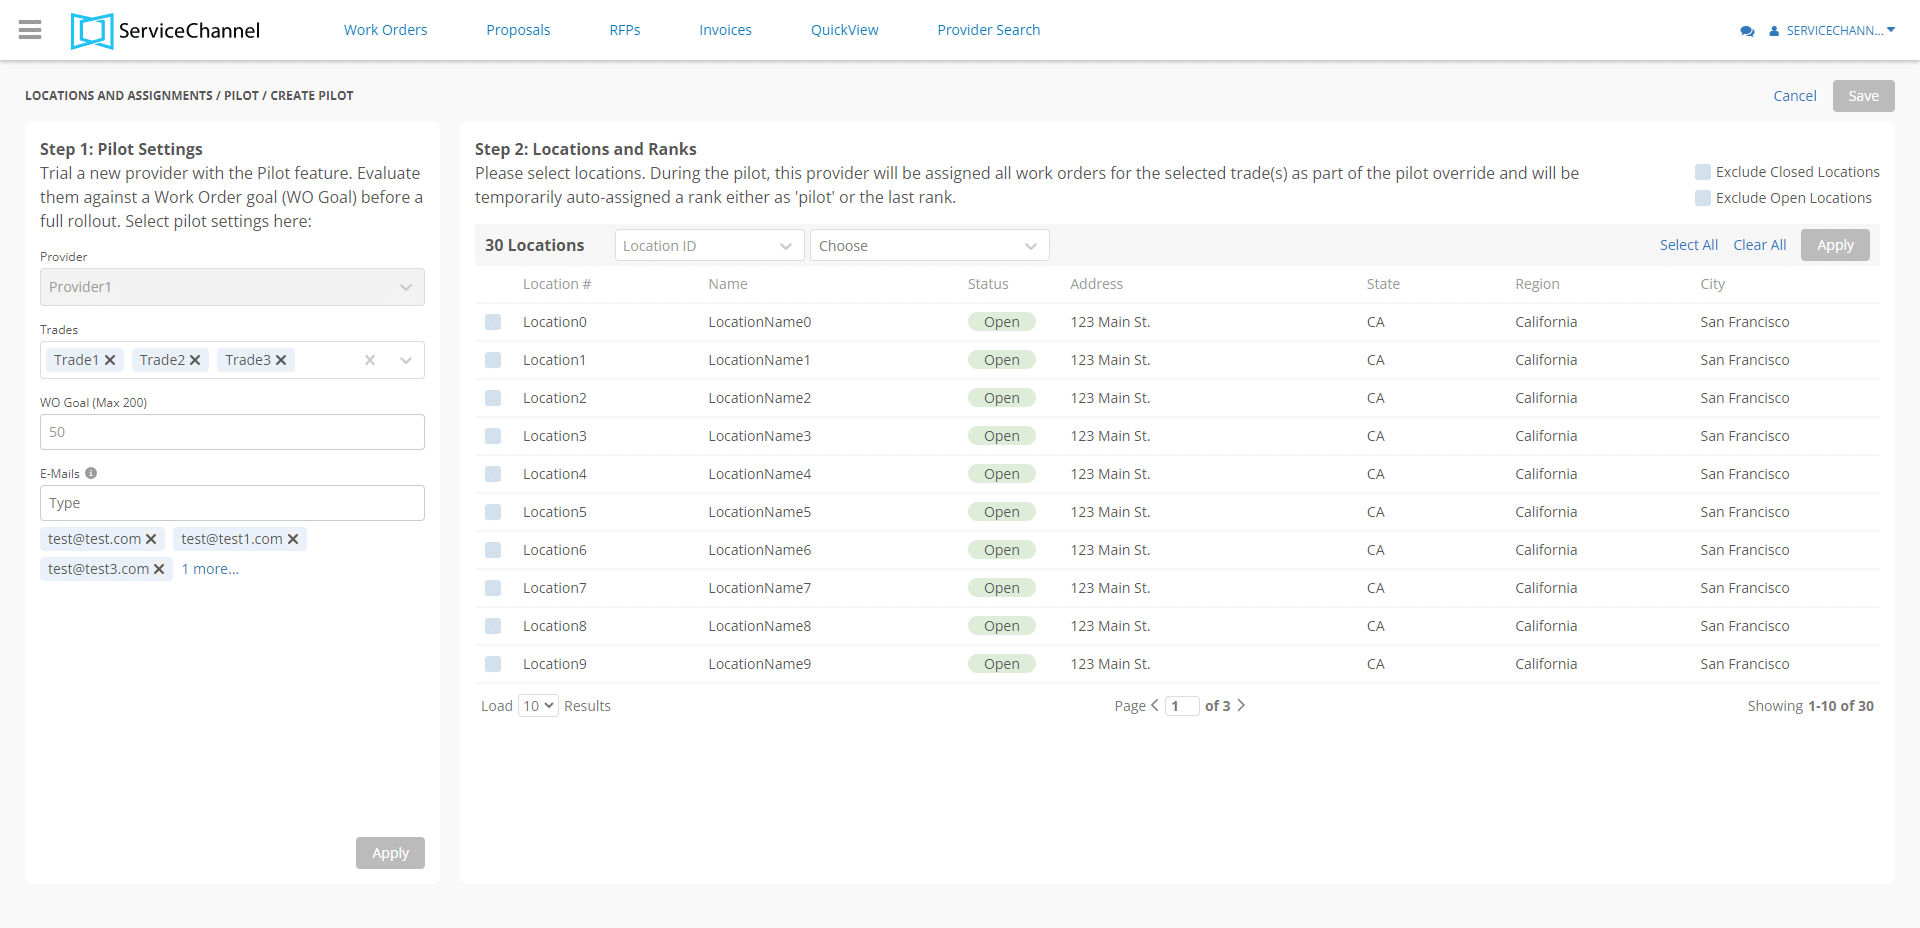
How to test a new provider with a pilot (available November 7, 2024):
- Go to Menu > Location & Assignments > Pilot > Create Pilot to set up a provider pilot. Select the provider, trades, number of work orders, and locations included in the pilot.
- Enter any email addresses that should receive a notification when the pilot is completed.
- Analyze the provider’s performance during the pilot period and decide whether to permanently assign the provider.
- Click the Assign button to rank the provider at your locations.
Simplify your planned maintenance
From pest control to fire and life safety, an effective planned maintenance (PM) program is critical to deliver on your customer expectations. To make this easier than ever, we released the new Planned Maintenance module in July 2024. You can start using the new module upon request or wait until it is enabled for all customers in early 2025.
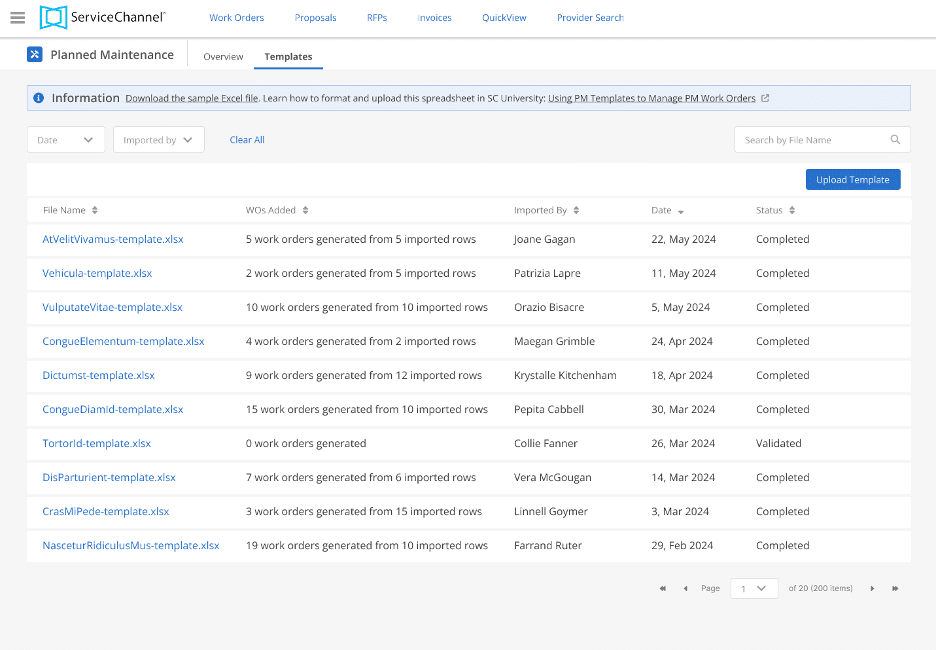
- See all your PM services on one page. The redesigned Planned Maintenance module gives you a simpler and more intuitive experience, starting with a holistic view of your entire PM program on the new overview page.
- Create services with fewer clicks. The streamlined workflow for creating and editing planned maintenance services ensures that nothing stands in the way of your proactive facilities strategy.
- Reuse past upload templates to save time. A refreshed templates page makes it easier to bulk upload work orders and reuse previous templates.
To get started, ask your Customer Success Manager or Support to enable the new module. Then go to Menu > Planned Maintenance to see the new look and feel.
Easily transfer assets between locations
The Asset Validation add-on module helps you capture any missing information and verify the quality of your data on a regular basis across all your locations, so you can make proactive replacement decisions.
Now with Asset Validation you can create a work order to transfer assets between locations with the help of your providers, then track all the transfers on the asset summary report.
- Maintain an accurate asset register. Use Asset Validation to capture the service history, condition, and cost insights you need for capital planning to maximize your ROI.
- Get help from your providers. Technicians collect asset information with every work order so you avoid stagnant data or repeated audits. Now you can also create work orders to transfer assets between locations, so you can always track their movements.
- Justify your investments. With validated data on all your assets, you can proactively replace those at the end of their useful life to reduce downtime, revenue loss, and wasted expenses.
To get started:
- Go to Menu > Assets Manager > Summary > Transfer
- Click the Schedule button to schedule an asset transfer
- You can also schedule an asset transfer from the location dashboard
If you’re not using the Asset Validation add-on, contact your Account Manager or Customer Success Manager to learn more.
Create asset work orders more easily
For work orders related to a specific asset, attaching the correct asset record ensures accurate data, gives you faster resolution times, and enables proactive repair vs. replace decisions. With new logic for creating asset work orders, that’s easier than ever.
To get started, work with your Customer Success Manager or Support to configure your location dashboard settings and issue list.
Then you can create asset work orders easily:
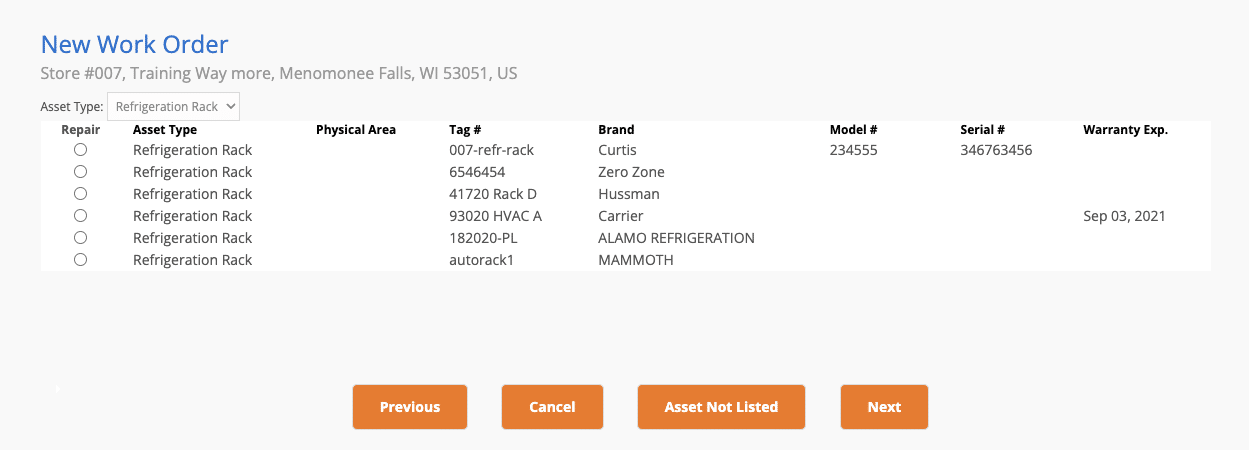
- Start creating a new work order as usual on the location dashboard or mobile app.
- Select the correct asset from a list of all the assets with a primary or alternate trade that matches the work order trade. To filter the list of assets, you can select the desired asset type from the menu.
- If the correct asset can’t be identified, select the “Asset Not Listed” option to create a work order without linking an asset.
Learn more from the experts
Check out all the innovations packed in the Fall 2024 Product Release Webinar and Product Release News.